In this article I will show you how to authenticate web api using JWT token. JWT stands for Json Web Token. I have created separate blog to explain about what is JWT and how it work please visit the blog from
here.
Before proceding this tutorial I will strogly recommend to read previos article to have good understanding on asp.net Core API.
Create asp.net core web api project and create Model class shown below.
Create EmployeeDbContext class and inherit from IdentityDbContext.
Identity is framework from Microsoft which provide default implementation for Authentication and Auhrization with minimal configuration.
Add connection string in appSettings.Json file and open startup file to configure SQL server.
Add-Migration and Update-Database command from package manager console and open SQL server Management studio to check created database with default tables from Identity framework.
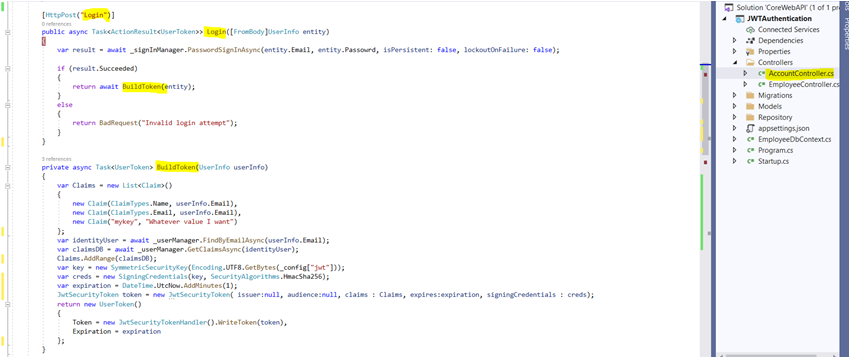
Create Account Controller with Login method shown below. For more detail of Token based authentication visit my Token based Authentication blog.
In above screen I have written code in Login method to generate token and this token needs to validate in each incoming Http request. StartUp.cs file is best place to authenticate as code from this class execute for each incoming request. Add code for token validation under configuration service highlighted below.
Open postman and enter URL for Login, provide username and password from body.
Login method returns token generated, this token can be used while accessing authorized data from API.
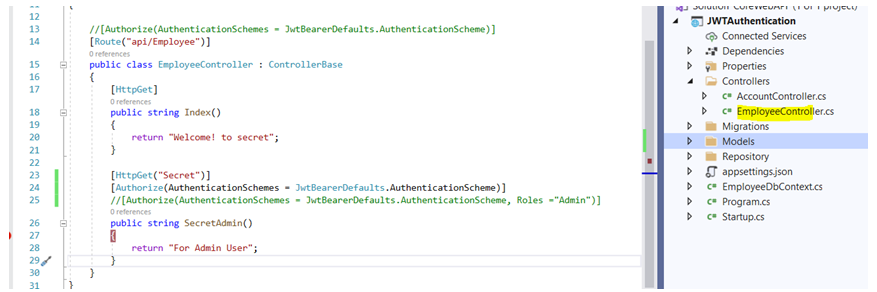
Now Create new controller with below code.
Open Postman and copy Token generated from Login request above. Copy value of Token property and not expiration property.
Select Authorization highlighted below and paste copied token from Login response and click on send. If Token is valid it will return message ‘For Admin Use’ highlighted below.


0 Comments:
Post a Comment
Subscribe to Post Comments [Atom]
<< Home