#10 minutes of reading
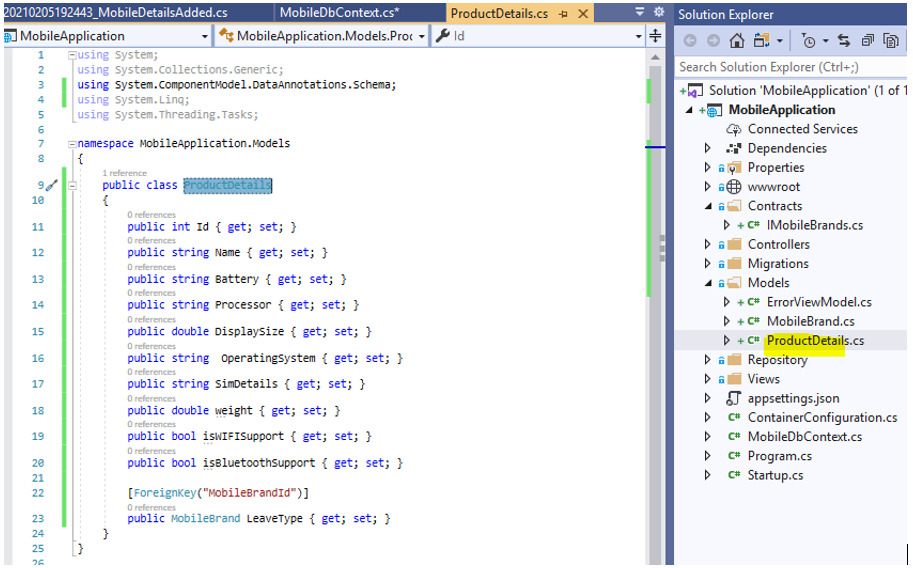
This again continuation from part 20 mini project. In this article I will show you to create generic contract(interface) for CRUD operation using repository pattern. Open Mobile Application project and Create ProductDetails class in Models folder. Source code available on
github.
Add productDetails property in MobileDbContext class to help in creating table in database after migration command.
Enter highlighted command in Package Manager console to create table in database shown below.
Check table in database using 2019 or SQL Server Management Studio IDE, table ProductDetails gets added.
__EFMigrationHistory in database maintain all history of migration performed from frontend.
Now we need to create contract and repository class for MobileDetails/productDetails. Before creating contract for ProductDetails let’s look at the available contract for MobileBrands.
Same methods also required for ProductDetails or any other table created with the help of model class later. Let’s reuse the same interface for ProductDetails and other module which may create in future, need to make it generic interface which will used for all models later.
I have made interface generic also under Contract folder, name need to change from IMobileBrands to IRepositoryCRUD.
Modify below changes highlighted after modifying names.
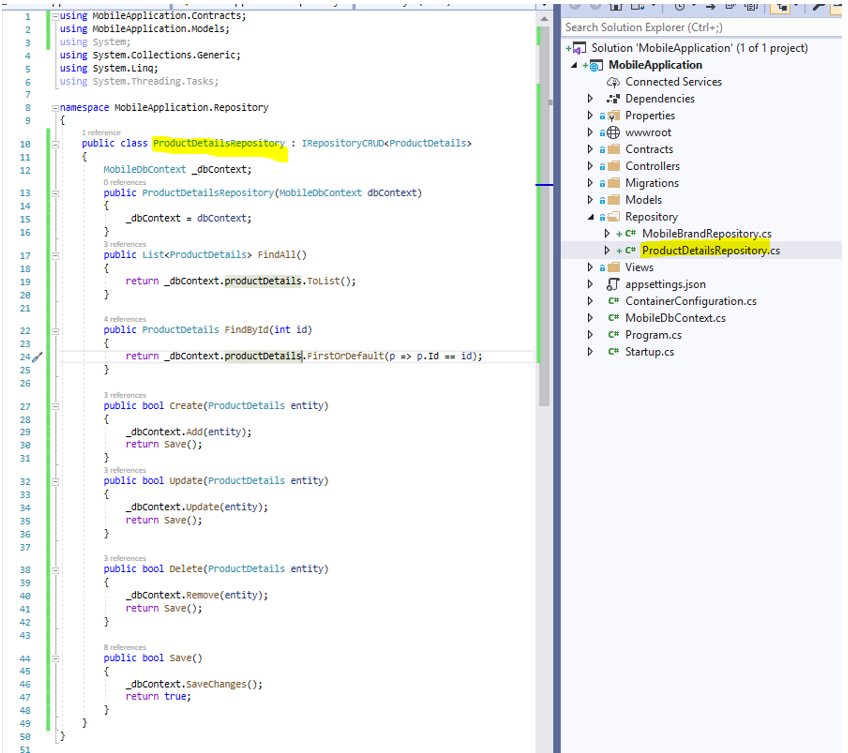
Create class ProductDetailsRepository and implement below methods for CRUD operation.
Update Dependency mapping for ProductDetails shown below.
Create ProductDetails controller with empty read write action methods.
Replace ProductDetails controller with below code.
public class ProductDetailsController : Controller
{
IRepositoryCRUD
_product;
public ProductDetailsController(IRepositoryCRUD product)
{
_product = product;
}
// GET: ProductDetailsController
public ActionResult Index()
{
return View(_product.FindAll());
}
// GET: ProductDetailsController/Details/5
public ActionResult Details(int id)
{
return View(_product.FindById(id));
}
// GET: ProductDetailsController/Create
public ActionResult Create()
{
return View();
}
// POST: ProductDetailsController/Create
[HttpPost]
[ValidateAntiForgeryToken]
public ActionResult Create(ProductDetails entity)
{
try
{
_product.Create(entity);
return RedirectToAction(nameof(Index));
}
catch
{
return View();
}
}
// GET: ProductDetailsController/Edit/5
public ActionResult Edit(int id)
{
return View(_product.FindById(id));
}
// POST: ProductDetailsController/Edit/5
[HttpPost]
[ValidateAntiForgeryToken]
public ActionResult Edit(int id, ProductDetails entity)
{
try
{
_product.Update(entity);
return RedirectToAction(nameof(Index));
}
catch
{
return View();
}
}
// GET: ProductDetailsController/Delete/5
public ActionResult Delete(int id)
{
return View(_product.FindById(id));
}
// POST: ProductDetailsController/Delete/5
[HttpPost]
[ValidateAntiForgeryToken]
public ActionResult Delete(int id, ProductDetails entity)
{
try
{
_product.Delete(entity);
return RedirectToAction(nameof(Index));
}
catch
{
return View();
}
}
}
Add strongly typed view for Index action of ProductDetails controller.
Also create remaining strongly typed View for Details, Create, Edit and Delete.
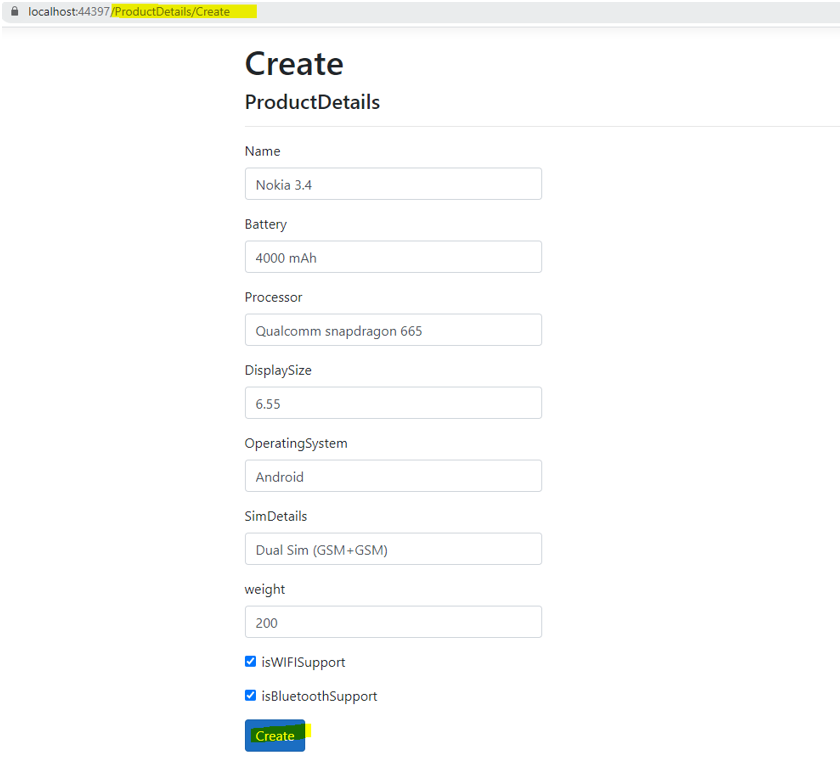
Once all view created, run application, and navigate to create action to enter data from view to database.


2 Comments:
This comment has been removed by the author.
Keep it up sir
Post a Comment
Subscribe to Post Comments [Atom]
<< Home