#15 minutes reading
In this article I will show you how dependency Injection
works in Asp.Net Core. Dependency Injection Principle is one of
concept/principle from SOLID principle. Sample code available on GitHub
Dependency Injection principle talks on loose coupling, Low level
(Data access logic, Business logic, …etc) objects not directly depend on high
level object (controller, Views, …etc) but on abstraction. Means dependency
injection is adding a layer between High level objects and low-level object and
the layer is nothing but abstraction.
Dependency injection provides better maintainability, reusability, and
testability.
Will understand Dependency injection with above real time
scenario. In above screen there are two types of mobile charger one without USB
connection and one with USB connection.
Charger without USB connection: Suppose cable
gets damaged you need to replace complete charger in that case. To connect your
phone, you need to purchase another cable. So here cable is directly connected
with wire.
Charger with USB connection: Suppose cable
gets damaged no problem purchase cable and use charger no need to bye new
charger with cable. Same cable used to connect with laptop for sharing data,
reusability comes here and better maintainability.
Same concept apply with Dependency injection, lets
understand with below screen.
If you choose tight coupling, where low level objects
(Entity framework, Plain Ado.Net) directly depend on high level objects. To
access Database related functionality in Controller, need to create an object
of Data access layer class to access members from class and creating low level
objects directly on high level is called as tight coupling.

On the other hand, loose coupling works very smooth and
interface work as mediator between high- and low-level object. It gives you
better maintainability, reusability and testability. Suppose My SQL is you
primary database and after few year database migrated from My SQL to MS SQL
server, Oracle, or Mongo Db in that case you just need to replace your Data
Access Layer(My SQL) and Plug-in Data Access Layer (MS SQL Server). If you wants to test your controller action and Data Access Layer is not available or someone else performing testing of Data Access Layer in that case based on interfaces database Mock classes will be used for testing controller actions.
Now you understand the benefit or loose coupling or
dependency injection.
Asp.Net Core by default support dependency injection with
IOC (Inversion of Control). It’s nothing but a container or a place where you
need to register Interface name and dependent object name and container from DI
manage creating an object on the fly.
Let’s create Asp.Net Core application using MVC template.
Create model class with name Student.
Now I’m creating models in same project but in real time
project good if you create separate project and maintain model there. Also,
separate project for writing DB functions like reading student data from
database, modify Student data, …etc.
Create StudentRepository class inside Model folder. For now
I’m creating everything in Models folder, as we proceed to through the course I
will show you how we can break and maintain in multiple projects.
Now we have interface with name IStudentRepository and class
with name StudentRepository. Our goal is not to use StudentRepository directly
in High level and user abstraction (IStudentRepository).
Open startup.cs file and register low level class with
interface.
We have register service (IStudentRepository) and
implementation (StudentRepository) successfully using DI (dependency injection).
Create strongly typed view for Index action of Student controller.
Index view created successfully, now run application and
check browser window.
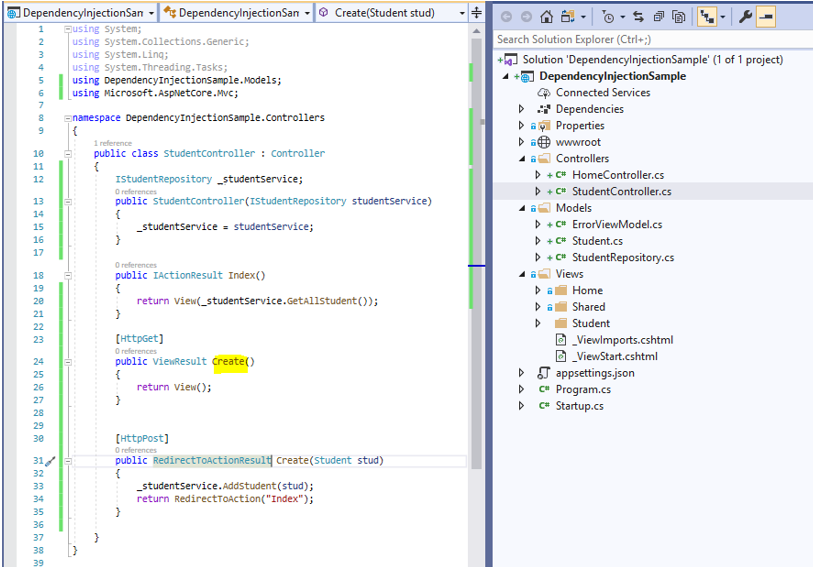
Update Student controller for Create student action method shown
below.
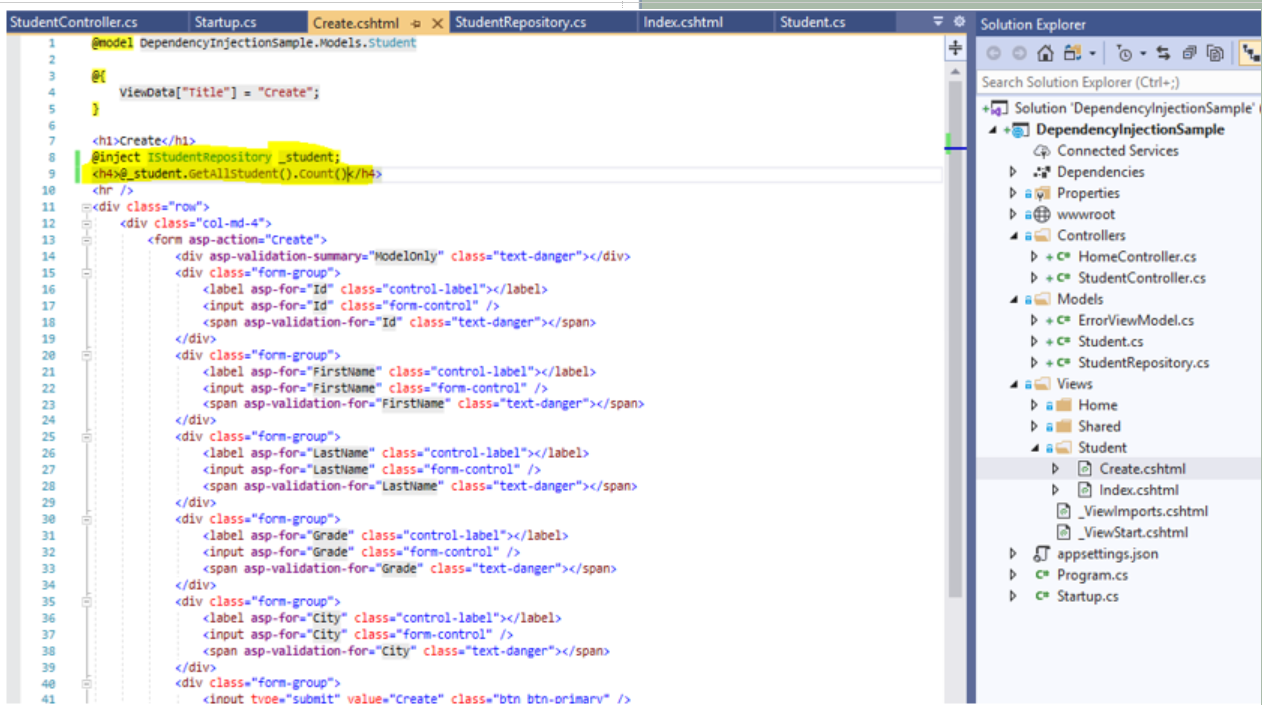
Create strongly typed
view using MVC scaffolding shown below.
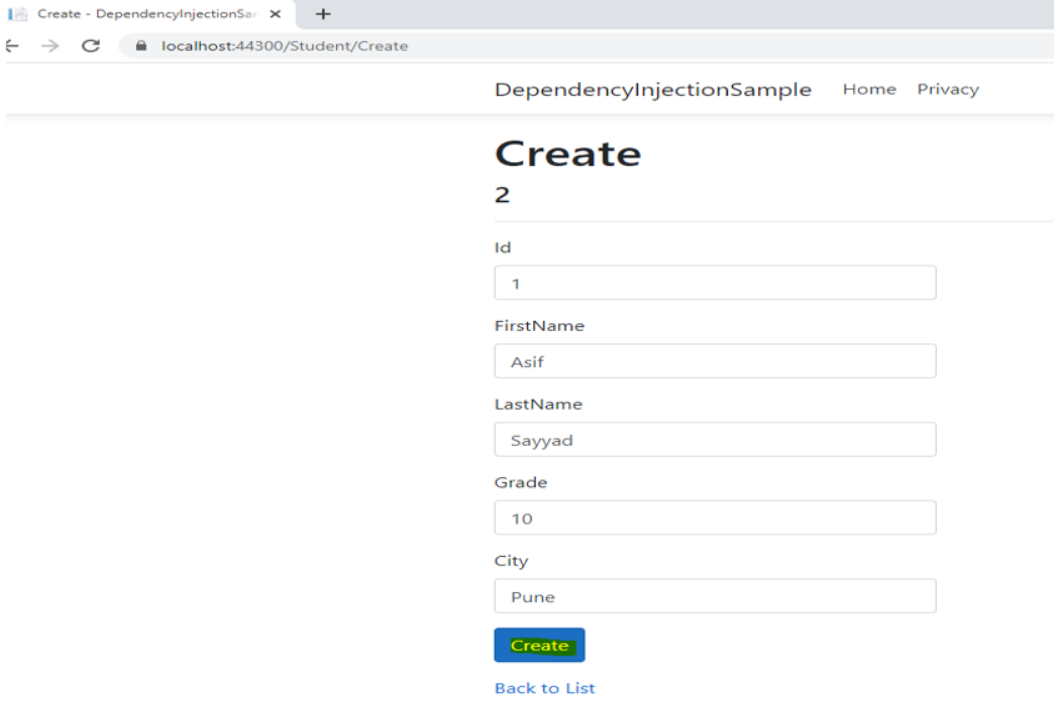
Now run application and check browser windows and click on Create
New action link on browser.
Click on Create button to add new employee
Let’s add few more student using Create New Action link from
above screen.